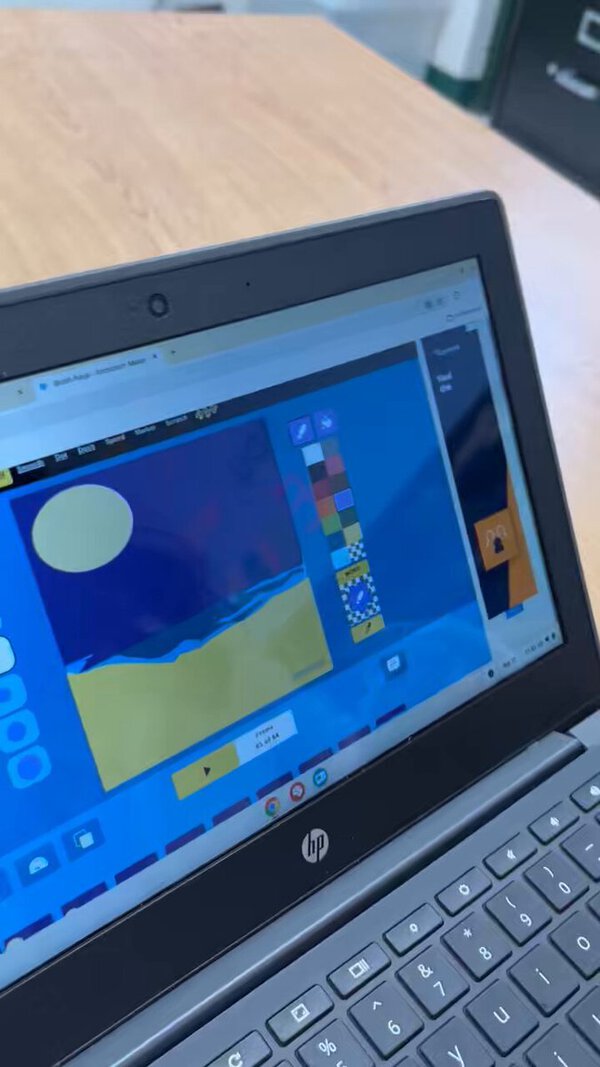
Making our mark on International Dot Day-ish with Brush Ninja Animation Maker!

Run a complete lesson from start to finish.
Animation can feel intimidating if you have never taught it before, but short looping GIFs are one of the easiest ways to introduce animation in the classroom.
Students can create something satisfying within a single lesson, even with limited devices or experience. The focus is not artistic perfection. It is experimentation, sequencing, and communicating an idea through movement.
This chapter shows how to run a simple animation lesson using Brush Ninja in a single class. Students create a short looping animation and export it as a GIF.
It’s designed to be quick to run, easy to set up, and flexible enough for different ages and settings.
This lesson works well for ages 7–14 (KS2–KS3), but older students can take the same structure further. It also works well for clubs and home learning.
Students need access to a device with a modern browser and internet connection. This could be a Chromebook, laptop, tablet, or desktop computer. You can use phones but the smaller screen makes it a bit fiddly for animation.
To collect work, you may want a shared folder, Padlet, or learning platform, although this isn’t essential. Students don’t need Brush Ninja accounts to take part.
A typical lesson fits into 40-60 minutes:
Before you begin, open the Animation Maker and create a simple 4-6 frame animation yourself. Export it as a GIF so you have a clear example to show.
Decide how students will submit their work. This could be through your LMS, a shared folder, or a Padlet board.
It also helps to prepare a simple prompt such as a bouncing ball, a waving flag, or a growing flower.
Explain the goal in one sentence:
Make a short looped animation that clearly shows an idea.
Simple ideas work best in a first lesson. A bouncing ball, waving hand, growing flower, blinking eye, or moving rocket all teach the core idea of frame-by-frame animation without overwhelming students.
Show a couple of simple examples from the gallery. Keep them easy to understand and avoid anything too complex.
Let students know what success looks like. A good animation should loop smoothly, be easy to follow, and export correctly as a GIF.
Open the Animation Maker and show how to:
Keep your demo simple. One object is enough.
Give students a clear constraint. This helps them get started quickly and avoid overcomplicating things.
You might limit them to 4–6 frames, a single object, or a simple looping idea.
As they work, check that they are:
Ask students to export their animation as a GIF.
They can submit their work through your chosen platform. If time is short, focus on getting a working export rather than polishing.
Many students redraw the entire picture on every frame. This often creates flickering and makes the animation harder to control.
Encourage students to keep most of the drawing the same and only change the part that moves.
Students also tend to make movements too small. If the animation does not appear to move clearly, ask them to exaggerate the changes between frames.
Short animations work best. Around 4–8 frames is usually enough to show an idea clearly. Simple drawings are often more effective than detailed ones.
If devices are limited, students can work in pairs, with one drawing and one directing, then swapping roles.
Using a timer can also help keep things moving.
Students who need more support can recreate a teacher example first before creating their own idea. This helps them focus on understanding the process rather than inventing a concept at the same time.
More confident students can experiment with timing, camera movement, short stories, or transformations between objects.
If animations don’t look like they move, encourage bigger changes between frames.
If they flicker or feel messy, remind students to keep drawings consistent and move one part at a time.
If exporting fails, ask them to try again and check their Downloads folder.
End with a quick prompt. Ask what they changed between frames, what they would improve, or what they learned by making the animation.
A short reflection is enough to turn the activity into a learning moment.
Students can build on this by creating explanation GIFs, simple sequences, or a short story across multiple frames.
Making our mark on International Dot Day-ish with Brush Ninja Animation Maker!
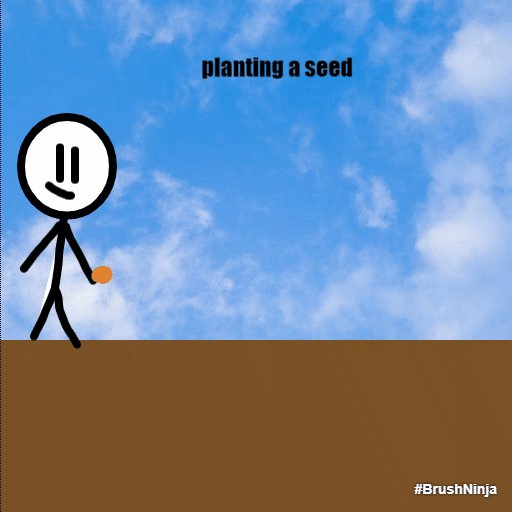
Here’s some fantastic GIF animations created by some of @esmsedinburgh’s P5 classes using Brush Ninja - a moon invasion and time-lapse plant growing cartoon! Totally normal thing to say in this job 🤣

When the ice cream van has visited the school playground it must be the last week of school term in Scotland! Enjoy the summer holidays!
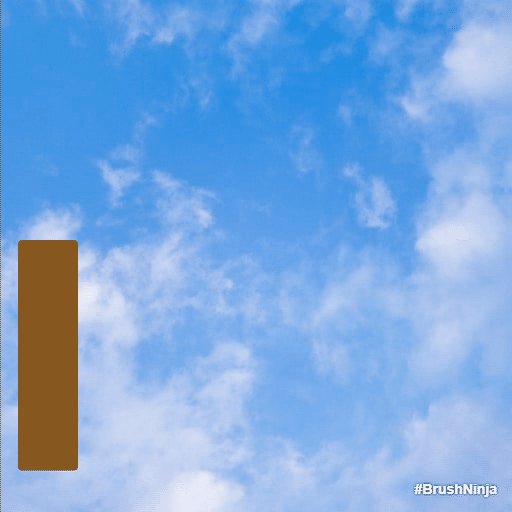
Wait for the end…Stewart’s Melville College @esmsedinburgh becomes Hogwarts @harrypotter! Animation creativity through a 9 year old child’s eyes.

Space Science is a favourite topic of young children! Recent launches by @SpaceX and @BoeingSpace keep their interest alive and I love that we provide space related learning opportunities well after the formal curriculum topic ends. Every mission shapes their future! Exciting!
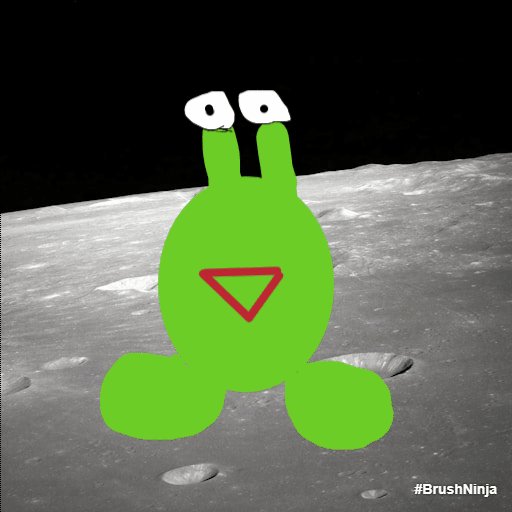
Crazy animation week with Primary 5 at @esmsedinburgh
Keep setup simple and avoid accounts or passwords.
Many creative tools assume every student has an account, email address, or online profile. In schools, this often creates unnecessary barriers.
Brush Ninja is designed to work well without logins, which makes it easier to use in primary classrooms, shared computer rooms, clubs, and short workshops.
This chapter explains how to run Brush Ninja in the classroom without student accounts. Most schools use it this way, as it keeps lessons simple and avoids unnecessary setup.
If you’ve already run your first lesson, this shows how to make that process smooth and repeatable.
Using Brush Ninja without accounts removes many common classroom issues. There are no passwords to manage, no forgotten logins, and no shared profiles.
Students can open the tool, create their work, and export it straight to their device. Student work is not uploaded to Brush Ninja, and students do not need to create profiles. This keeps lessons focused on making rather than administration.
When students use Brush Ninja without logging in, their work exists only on the device they are using. While they are working, it is stored temporarily in the browser. Once exported, it becomes a file saved locally.
Students then submit their work using your normal classroom systems.
In most lessons, the process looks like this:
There’s no setup or accounts required beyond sharing the link.
Teachers often worry that students will lose work without accounts. In practice, simple export routines are usually enough.
Most classrooms already use systems for collecting files, so Brush Ninja fits into existing workflows rather than replacing them.
Different schools use Brush Ninja in different ways:
The same export-based workflow works well across all of these environments.
On shared or temporary devices, students should always export their work before logging out. Browser storage may be cleared automatically, so it should not be relied on.
For longer projects, saving .brushninja files locally can help students return to their work later. Clear instructions and regular reminders are usually enough to prevent problems.
Some teachers prepare starter files in advance. These are .brushninja files that students can open and edit.
They might include backgrounds, diagrams, or simple templates to help students get started quickly. These files can be shared directly, and students can use them without needing accounts.
Most classes do not need accounts. In some cases, a teacher account can be useful for preparing templates, storing personal work, or creating reusable resources.
Even then, students do not need to log in.
If students cannot find their work, check the Downloads folder and search by file name.
If work disappears, it is usually because the page was refreshed. Encourage exporting early and often.
If files are saved to the wrong account or location, remind students to use local downloads rather than shared browser profiles.
If the animation is corrupted and you have an exported GIF or a saved .brushninja file, you can usually recover the work by opening it in the editor.
Using Brush Ninja without logins means there are no student profiles, no public posting, and no central storage of student work.
This aligns well with most school safeguarding policies. For more detail, see the For Schools page and the Privacy Policy.
Check your devices will work and avoid common issues.
Brush Ninja is intentionally lightweight and works on most school devices, including older laptops and Chromebooks commonly found in classrooms.
This chapter explains which devices and browsers work best with Brush Ninja, and how to avoid common technical issues in the classroom.
If you’re unsure whether your setup will work, this should give you a clear answer.
Brush Ninja runs entirely in a web browser and does not require any software installation.
Students need a modern browser, an internet connection, and a way to interact with the screen, such as a mouse, trackpad, or touch input. No plugins, extensions, or downloads are required to get started.
Before teaching with a new set of devices, try creating and exporting a very small animation yourself.
This quickly confirms that:
A quick test prevents most technical surprises later.
Brush Ninja works best in modern, up-to-date browsers. In most schools, Google Chrome and Microsoft Edge provide the most reliable experience. Firefox and Safari on macOS and iPadOS also work well.
Keeping browsers updated is important, as older versions can cause issues with saving, exporting, or performance.
Very old browsers, such as Internet Explorer, are not supported. Systems that block downloads or browser storage may also prevent students from saving their work.
Brush Ninja works well on Chromebooks and is widely used in schools.
Most issues are related to downloads and permissions rather than the app itself. Students should be able to download files and access the Files app to find their work.
If downloads do not appear, check that the school profile allows image and GIF files. Some managed accounts block these by default.
If animations feel slow, reducing the number of frames or canvas size usually solves the problem.
Brush Ninja runs well on most modern laptops and desktop computers.
Current versions of Chrome, Edge, Firefox, or Safari provide the best experience. Typical school devices with around 4GB of memory are sufficient for most projects.
A mouse or trackpad works well for drawing, and graphics tablets can be used if they are already set up.
Brush Ninja supports touch input and works on tablets, including iPads and Android devices.
On iPads, Safari and Chrome both work well on recent versions of iPadOS. A stylus can improve control, but it is not required. Android tablets also work in Chrome, although performance varies depending on the device.
Smaller screens can feel more restrictive, especially for longer projects, and file management can be less straightforward.
On shared computers, students should always export their work before logging out. Browser storage may be cleared automatically, so it should not be relied on.
If a device resets or a session ends, any unexported work may be lost. Exporting regularly is the safest approach.
Brush Ninja needs access to the main website and the ability to download files.
If the site does not load or exporting fails, check web filters, firewall rules, or proxy settings. Some filtering systems may block downloads, media files, or browser features used by creative tools.
Student work is saved as files on the device being used.
Make sure downloads are allowed, the Downloads folder is accessible, and students know where their files are saved. On cloud-based systems, they may need to move files into their usual storage location after downloading.
For smooth performance, it helps to keep animations relatively simple. Very large canvases or long animations with many frames can slow down older devices.
Closing unused tabs and restarting slow devices can also help. Most simple projects run well, even on modest hardware.
More optimisation tips are available in the Performance Guide.
Students can work with a mouse, touch screen, stylus, or trackpad. Some students find touch input easier, while others benefit from larger screens and precise pointing devices.
Activities can also be adapted by reducing drawing complexity and focusing on simple movement rather than detailed artwork.
If students use assistive technology, it is worth testing activities in advance and adjusting tasks where needed.
You can read more in the accessibility statement or download the VPAT below.
Download the Brush Ninja VPAT (PDF)
Before running a lesson, check that:
A quick check here can prevent most issues.
You may need IT support if downloads are blocked, browser storage is disabled, the site is filtered, or student profiles reset frequently.
Sharing this guide with technical staff can help resolve issues more quickly.
Help students save, name, and organise their work.
File management is often the hardest part of creative digital lessons, especially for younger students. A few simple routines make a huge difference.
This chapter explains how to manage student work when using Brush Ninja without accounts.
Because files are saved on the device being used, students need simple habits for saving, naming, and finding their work. Once these are in place, most file-related problems disappear.
Brush Ninja does not store student work on its servers.
While students are working, their project exists temporarily in the browser. Once they export, it becomes a file saved on the device.
Until that point, the work is temporary. Exporting regularly is the key to avoiding problems.
For more detail on exporting, see Exporting and Submitting Work.
Different tools handle file names differently. In the Animation Maker, students can usually choose a name before downloading. In other tools, files are created with a generic name.
Generic names are easy to overwrite and hard to organise. Renaming files is an important final step.
Give students one format and reuse it consistently.
For example:
class-topic-name.ext
Such as:
Displaying this on the board and in instructions saves time later.
Students often think saving and exporting are the same thing.
The Brush Ninja animation editor allows students to save their work as .brushninja files. These are project files that can be reopened in the editor for further editing.
Exporting creates a final file in a standard file format such as GIF, PNG, or PDF. These can be shared or submitted. Saving is for ongoing work, while exporting is for finished work.
On most devices, files are downloaded into a Downloads folder.
Students should know how to find this folder and rename files inside it. A quick demonstration early on usually prevents confusion later.
If you use cloud storage, show students how to move files from Downloads into their normal folders.
For longer projects, organisation becomes more important. Files should be saved with clear names and moved into folders for each project or class. This helps students find their work later and keeps things tidy. Brush Ninja may keep in-progress animations in the browser, but this should not be relied on.s Regular saving will allow students to return to their work later, and also to move between devices if needed.
Students may create multiple versions. When downloading, browsers often add suffixes like “(1)” or “(2)”, which helps prevent overwriting.
On shared devices, files may be removed automatically when users log out. Do not rely on files staying on the device between sessions. Using shared folders or cloud storage is the safest option.
When a student cannot find their work, start with one question:
Did you export it?
Most missing files are either still in Downloads or were never exported. Searching by file name usually helps.
On shared devices, files may have been cleared automatically.
For younger learners, file management can easily become harder than the creative task itself. Try to focus on shorter tasks that do not need multiple versions.
Paired work, clear demonstrations, and simpler expectations can help. In some cases, accepting a single final export or even a screenshot is enough.
Many teachers even film the computer screen during playback with a phone camera. This removes the need for file management entirely and also allows students to be in the video with their work.
In early sessions, it is often better to prioritise experimentation and discussion over perfect organisation. Technical routines can be introduced gradually over time.
Simple routines prevent most file problems:
Use your existing systems to collect and organise work.
Sharing work gives animation lessons energy. Students often put more thought into their work when they know somebody else will see it.
This chapter explains how to collect student files, share finished animations, and use them for discussion, reflection, and display.
Students export their work as files and submit it using your existing systems. With a simple, consistent process, this works reliably across most classrooms.
The simplest workflow is:
This keeps collection simple and works with most school systems.
Use the system students already know.
Google Classroom, Microsoft Teams, Seesaw, Showbie, shared folders, school drives, and learning platforms can all work well. The tool matters less than the routine.
For assessment, use your normal submission platform. For discussion or celebration, a digital noticeboard such as Padlet can work better because students can see each other’s work more easily.
Email works for very small groups, but it quickly becomes difficult to manage.
Many problems happen because students are unsure what “submit” involves.
It helps to demonstrate the full process once. Show how to export, where the file is saved, how to rename it, how to upload it, and how to confirm that it worked.
A short checklist in your LMS or classroom can reinforce this.
File naming and organisation are covered in Managing Student Files.
Sharing does not need to take long. A short five-minute review can work well at the end of a lesson.
Choose two or three examples and ask the class to notice something specific, such as:
This keeps the discussion focused on learning rather than simply choosing favourites.
Sharing does not need to take long. A short five-minute review can work well at the end of a lesson.
Choose two or three examples and ask the class to notice something specific, such as:
This keeps the discussion focused on learning rather than simply choosing favourites.
Over time, it can be useful to build collections of student work.
Create folders by class, topic, date, or project. Keep final versions separate from drafts so it is easy to find examples later.
These collections can support displays, revision, parent evenings, future lessons, or examples for the next class.
When collecting lots of animations, do a quick first check before reviewing the work properly.
Check that:
This quick check catches practical problems before you start giving feedback or marking.
When collecting work from a whole class, small inconsistencies quickly become annoying.
Consistent file names, clear folders, and a single submission location make review much easier. It also helps to set a deadline for final versions so you are not sorting drafts, duplicates, and unfinished files later.
Some students find digital submission difficult, especially if they are working across downloads, cloud storage, and classroom platforms.
A live demonstration helps. Show the full journey from export to upload, then ask students to check their final file before they finish.
For younger students, pair them up so one student follows the instructions while the other checks each step.
If work appears to be missing, check whether it was exported first. Most missing files are still in Downloads or were never exported.
If students upload the wrong version, ask them to preview the file before submitting.
If a platform rejects a file, check the file type and size. Some systems limit GIFs or large images. In that case, students may need to simplify the animation, export again, or convert GIFs to MP4 videos if supported.
Give clear, useful feedback that supports learning.
This chapter looks at how to give clear, useful feedback on student animations.
Animation is a powerful way for students to explain ideas, but much of the learning comes from reflection as well as creation. Good feedback helps students understand what worked, what needs improving, and what to try next.
Animation combines drawing, sequencing, timing, and explanation. Without feedback, students often judge success by how the animation looks.
With feedback, they begin to think about clarity, accuracy, and communication. This turns creative output into evidence of learning rather than just a finished product.
Feedback works best when students know what you are looking for before they start.
At the beginning of a task, define a small number of success criteria. For example, whether the idea is clear, whether the movement is easy to follow, whether the animation loops smoothly, and whether the content is accurate.
Keep these visible and refer back to them during the lesson.
A consistent structure helps both teachers and students:
What works → What could improve → What to try next
This keeps feedback balanced and actionable. Short, specific comments are usually more effective than longer explanations.
Here are some examples of feedback comments that focus on the learning goals of animation:
During creation time, brief conversations are often the most effective form of feedback.
Simple questions such as “What is happening here?” or “What should the viewer notice?” prompt reflection without interrupting work. These moments help students catch issues early.
Avoid taking control of the work. The aim is to guide thinking, not fix the animation. For short classroom activities, feedback should stay lightweight and focused.
A quick verbal conversation during the lesson is often more valuable than detailed written comments afterwards.
When reviewing exported animations, focus on a small number of points.
A useful rule is one positive observation, one improvement suggestion, and one next step. Referring to a specific moment in the animation helps students understand exactly what you mean.
Peer feedback can be valuable when expectations are clear.
Model what helpful feedback looks like and use a simple structure, such as one strength, one improvement, and one question. Keep early sessions short and focused.
Short gallery-style sessions work well with animation.
Students view each other’s work and respond to prompts. This helps them see different approaches and develop visual awareness.
These sessions work best when they are time-limited and linked to clear criteria.
Some students work hard but struggle to produce polished results.
Make sure feedback recognises effort, progress, testing, and problem-solving, not just the final outcome. Students who experiment and refine their work are developing valuable creative skills, even if the final animation remains simple.
Digital work can quickly become time-consuming to mark.
To keep feedback manageable, rotate focus groups, give detailed feedback on selected tasks, and use whole-class feedback for common issues.
Not every piece of work needs detailed individual feedback.
Feedback is most effective when it connects to the next task.
Encourage students to review previous comments, choose one thing to improve, and apply it in their next animation.
Make sure work is saved, submitted, and not lost.
This chapter explains how to turn student work into finished files and submit it reliably.
Because Brush Ninja does not store projects on its servers, exporting is essential. Until a file is exported, the work only exists temporarily in the browser.
Exporting and uploading always takes longer than students expect.
Try to leave at least five minutes at the end of the lesson for:
When students export their work, the app creates a file and downloads it to the device being used. This file can then be uploaded, shared, or stored like any other document.
If the page refreshes or the device logs out before exporting, the work may be lost. Exporting should be treated as part of completing the task, not as an optional extra.
Most problems happen when students leave exporting until the end of the lesson.
Encourage exporting during longer sessions, after major changes, and at the end of each lesson. This creates simple backups and reduces the risk of lost work.
A clear reminder helps:
No export means no submission.
The Animation Maker exports work as animated GIF files.
Students export by choosing the download option, selecting GIF format, entering a clear file name, and saving the file. Once exported, they should open the file to check that it plays correctly.
Larger or more detailed animations may take a few seconds to export.
Other Brush Ninja tools export images, PDFs, or documents.
These files are often given generic names, so renaming is important. For more on naming and organisation, see Managing Student Files.
Different tools produce different file types. Most animation work will be GIFs, while drawings are usually PNG or JPG, and comics may be PDFs.
Be clear about which format you expect for each task. This avoids incompatible uploads and unnecessary resubmissions.
On most devices, exported files are saved in the Downloads folder.
Students should know how to open this folder, find recent files, and rename them if needed. On tablets, files may appear in a Files app or download manager.
Students should open and preview exported files before submitting them.
This helps catch all sorts of issues, such as:
Once exported, students submit their files using your usual systems.
The exact method will vary, but the process is always the same: upload the file and check that it appears correctly. Students should confirm their submission before finishing.
Students often struggle because they only learn part of the workflow.
Demonstrate the full sequence clearly:
Export → Rename → Preview → Upload → Check
Repeating this consistently helps it become routine.
On shared computers and Chromebooks, storage may be temporary.
Students should export and submit work within the same lesson wherever possible. Do not rely on files remaining on the device between sessions.
Large files can be slow to upload or may be rejected by some systems.
If this happens, reducing the number of frames, lowering the canvas size, or simplifying the animation usually helps.
Before finishing, students should check:
Simple routines make exporting reliable.
Five-minute export warnings, clear file naming rules, and end-of-lesson checks prevent most problems. Consistency is more important than strict rules.
At this point, you have a complete workflow:
Students create work, export it, organise files, submit them, and receive feedback.
Once these routines are in place, lessons run more smoothly and students can focus on the creative and learning aspects of animation.
You can now extend this into longer projects, cross-curricular work, or more creative tasks.
Explore more ideas in the teaching guides or try building a sequence of lessons using the same workflow.
Brush Ninja is a free online animation tool for education. It is designed to be simple and accessible, while still powerful enough for creative expression, storytelling, and learning.
Brush Ninja is developed by Ben Gillbanks, a developer and digital creator based in the UK. It is supported by donations from users and organisations. If you find it useful, please consider supporting the project to help keep it free for everyone.
If you have any feedback on this guide, please get in touch to share your thoughts and suggestions.